Making Leave Requests
Simple Leave makes it easy to request time off and track your available leave. Whether you're booking a holiday, logging a sick day, or taking time off for an appointment, you can submit your request in just a few steps.
This page walks you through how to request leave and what to expect after you submit it.
Step 1: Visit the "My Leave” Page
From the menu click on the "My Leave" link. This will take you to the My Leave page which gives you an overview of all the different types of leave.
You will notice that a cycle will have been selected - generally this will be the current leave cycle you are in. Check that the correct cycle has been selected.
Find the tile for the leave policy and click the New Request button.
Step 2: Complete the Request Form
Check that the pre-populated values are correct for:
- The Leave Cycle Period (this determines the start and end date you can select for your leave)
- The Leave Policy
Then perform the following:
- If a Sub-Policy drop down is showing, select the appropriate Sub-Policy for this leave.
- Select the start and end dates of your leave request.
- Enter any comments you wish to add to the leave request.
The form will populate with the dates and leave value to put against each date. It will use information from the Calendar Cycle settings to understand any non-working days.
- You should review the values populated here.
- You can add decimal values, e.g. 0.5 for a half day.
Step 3: Submit Your Request
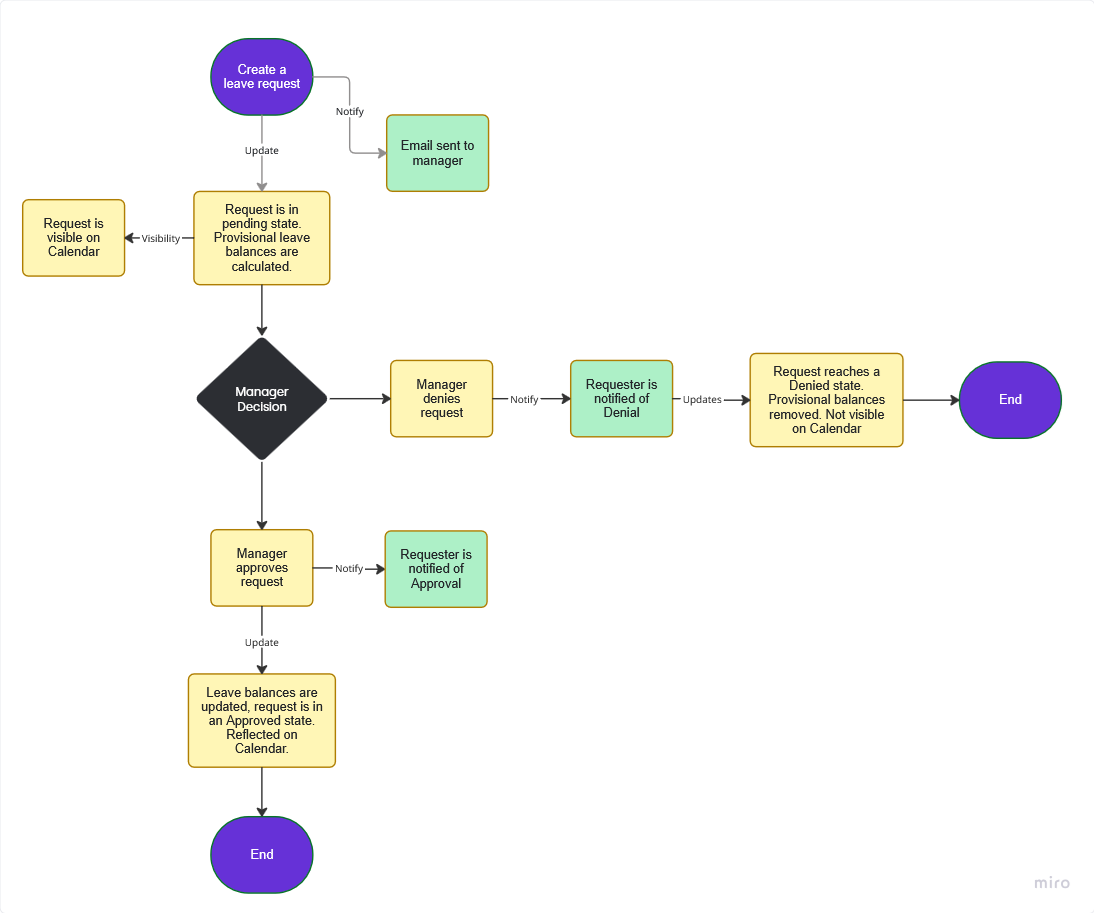
Click on the Submit button. Once submitted:
- The request goes into a Pending state.
- Your manager receives an email notification that a request has been raised.
- The leave will initially be deducted from your allowance but as it is pending it is subject to change.
- The request could be Approved, Denied or Deleted. You will receive an email notification of the outcome. You can also see the request at any time
Video Example
Video example - note, there is no sound or commentary on this:
Administrators and Managers
Administrators and Managers can raise requests on behalf of employees. When they do, requests are automatically approved.